Showing posts with label DIY. Show all posts

Wednesday, December 31, 2014

Ooh la la! DIY Gold Chandelier


Ever see all those fancy decorations and then when trying to find it, you can never find what you are looking for?  Ya, that's me...always...I have these insane ideas for DIY projects and decorations and sometimes the ambition to complete them.  Luckily, I have a crazy enough family that is willing to humor me and be ambitious with me!

So this is where the golden chandelier was created, inspired by the Great Gatsby for a Roaring 20's themed party.  When trying to find one to buy, they were all too small and would get lost in the size of the room so we created two! 

What you need (this will make 2): 
  • 1- 12' fringe curtain such as this one or you can use 2-fringe table skirts (just make sure the length is what you are looking for as well as long enough to cover your hula hoop!)
  • 2 hula hoops (the size you would like your chandeliers to be)
  • spray paint similar to the color of your fringe curtain 
  • packing tape/masking tape
  • thin string/fishing line
  • hot glue gun
  • scissors
  • a large area to lay out the curtain on
  • 2 people! This will definitely make this a lot easier

  1. Spray paint your hula hoops. You only need to spray paint the side that is facing down, but can do both sides if you'd prefer.  
  2. If you are using table skirts, skip to step 6.  Lay out the curtain on the floor. You will want it as flat as possible with as few strands overlapping as possible.  This will make the next step easier. 
  3. Using your second person, pull a piece of packing tape that is the width of your curtain (12 feet) and half way down the length of the curtain (4 feet).  The metallic fringe was full of static so we placed the tape down on both sides at the same time, then pushed the fringe to the tape.
  4. Next, cut along the TOP part of the taped area along the width of the curtain (12 feet).  You have now made 2 long strips of fringed curtain that are 4 feet long.  
  5. Flip the curtain over and put another strip in the same spot as the tape on the other side.  
  6. Take one strip and hot glue it to the hula hoop. Hot glue small amounts at a time so the glue doesn't dry before you are able to get the curtain attached.  Be careful, it gets hot!!!
  7. Once your hula hoop has fringe all around, cut the excess off.
  8. Repeat steps 6 & 7 for your second hula hoop.  
  9. Attach 3 pieces of string to the hula hoop and loop together.  Hang using string or fishing line.  I hung this on a fan, but you can hang from anywhere on a ceiling.  Command hooks work great! 
  10. Trim any crooked fringe or if it is hanging too low.  
  11. Voila! You have yourself two chandeliers!
Additional Thoughts: If you have the time, you can also make a second smaller hula hoop fringe to hang underneath it to add depth.  We ran out of time, but it could have been a nice touch.  

Here is a picture tutorial to help with these directions! Good luck! :) 

1. Spray paint your hula hoops. You only need to spray paint the side that is facing down, but can do both sides if you'd prefer.  


2.  If you are using table skirts, skip to step 6.  Lay out the curtain on the floor. You will want it as flat as possible with as few strands overlapping as possible.  This will make the next step easier.

3. Using your second person, pull a piece of packing tape that is the width of your curtain (12 feet) and half way down the length of the curtain (4 feet).  The metallic fringe was full of static so we placed the tape down on both sides at the same time, then pushed the fringe to the tape.


4. Next, cut along the TOP part of the taped area along the width of the curtain (12 feet).  You have now made 2 long strips of fringed curtain that are 4 feet long.  


5.  Flip the curtain over and put another strip in the same spot as the tape on the other side. 

 
6. Take one strip and hot glue it to the hula hoop, wrapping it around the top of the hula hoop. Hot glue small amounts at a time so the glue doesn't dry before you are able to get the curtain attached.  Be careful, it gets hot!!!

7. Once your hula hoop has fringe all around, cut the excess off.

8.  Repeat steps 6 & 7 for your second hula hoop.
9,  Attach 3 pieces of string to the hula hoop and loop together.  Hang using string or fishing line.  I hung this on a fan, but you can hang from anywhere on a ceiling.  Command hooks work great! 

10,  Trim any crooked fringe or if it is hanging too low.  


Voila! You have yourself two chandeliers!

Monday, September 8, 2014

Football Time! Football Cake Tutorial


One of my favorite things to do is make/decorate cakes. We were heading to a football party so I decided to make a football cake (chocolate cake with peanut butter frosting covered in ganache). Wilton makes a football pan, but I don't have one. So here is a tutorial on how to make a football cake without the pan! Enjoy!

What you will need:
- One rectangle cake - I used a glass Pyrex that was smaller than a 9x13 - maybe a 9x6?? Does that exist??
** You can use a 9 x 13 pan, you will just cut your football template a little smaller so you have extra to piece together the top**
- 2 cupcakes or a smaller cake (if using a smaller pan - you will have extra cake batter, so I made cupcakes)
- frosting (any color for the football and green for the grass)
- chocolate ganache
- white frosting, candy clay, or fondant for laces on football


*I used a homemade cake batter so it definitely makes more than a box of cake, however, you should be good with just one boxed mix.  My cake batter made this cake and 12 cupcakes.


1. Once you bake and cool your cakes,  you are going to make a football template. I cut the cardboard  cake board to the size of my cake, then drew the football.  Trim as needed and check it on your cake.  


2.  Cut your cake out, save the corners because you are going to use them for the top layer! 


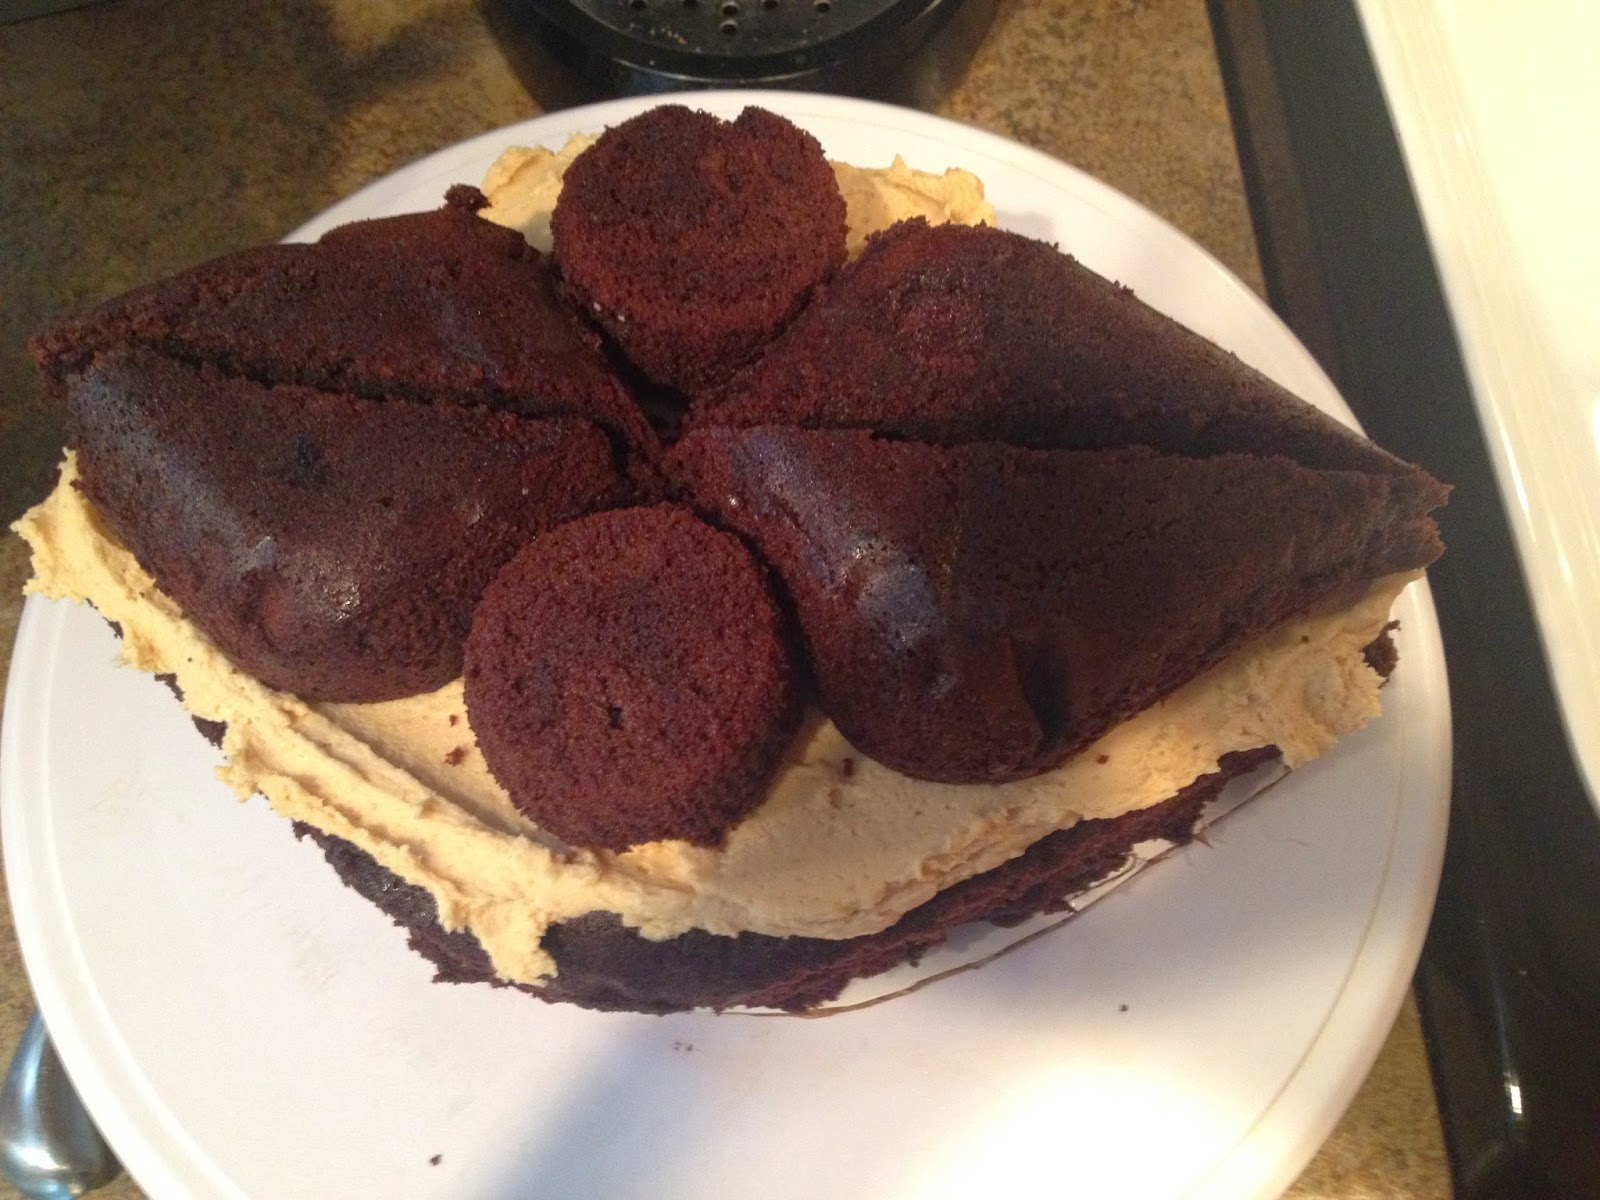
 Below are all my pieces deconstructed.  I used my cardboard template as my cake board.


This is them together (I played around for awhile to get what I thought was the best ratio.) If you are using a 9x13 pan, cut your football template a little smaller than the pan, then you should have enough leftover pieces to put together for your second layer.    

3.  Add frosting to the top of your bottom later and place your second layer of pieces on top.  Now some of you are wondering why I didn't make a second rectangle cake, and this happened for a few reasons.  First, I thought my cake would have rose more to have the "rounded" football effect on the top.  Second, if I put a second rectangle on top, I know my football would have ended up boxy or uneven. I'm still working on my carving skills, so the rounded pieces of cake helped me to achieve the roundedness (that's a word right??) of my football! 

The only thing I really "carved" was making the football shape for the bottom layer and I cut down the corners so they came to a point. 


4.  Now its time to frost it! Fill in all those extra spaces. Who doesn't love TONS of frosting?!? Especially peanut butter in my case! 


 Look at this hot mess!!!! Throw it in the fridge for 15 minutes.


Add more frosting and smooth it out. 

5.  Press the cake with a paper town to smooth out the lights and add texture like a football.


6. Place the cake in the fridge while you make and cool the ganache.  

7.  When the ganache is cool, but still pourable, take the cake out and place it on a cooling rack. Place the cooling rack on a foil covered cookie sheet or tray.  This will make clean up from the ganache nice and easy! 

8. Pour ganache over the cake starting in the middle and slowly making bigger circles. 


Let the ganache drip off for a little while.  

9.  Once the ganache stops dripping, transfer your cake onto your serving dish. The ganache will still be VERY gooey.

 10.  Roll out your fondant/candy clay and cut two long strips. Carefully place them on the cake (You may get chocolate all over them like I did if you're hands are bit shaky, just take your time!)  Then cut one skinnier stripe for the middle and little slices for the laces.

As you can see, the bottom of my cake isn't perfect.

11.  This is where borders come into play.  Using green frosting and the grass (Wilton tip# 233) and pipe straight up in short squeezes to make the grass standing up.  Voila! You're cake is finished!

Let me know if you have any questions!

Happy Creating and Baking!

Monday, September 1, 2014

I did it!!! Dyeing 100% Polyester Chiffon Fabric!!!


So I have this beautiful wedding dress from 3 years ago that has been sitting in the closet untouched, unlooked at... So...I wanted to do something different. As you can see from the pictures, it's not really a dress you can just dye and wear it out.


You like the dead plant in the middle picture?! haha I don't have the greenest of thumbs! 
The embroidery and beading make it a little too fancy for your typical wear.  That's why I decided to cut (gasp!), dye (gasp!), and recreate my wedding dress into a cocktail dress!!! Yay!!! 

Cutting up my wedding dress! 
I slowly seam ripped all the threading for the beading and flowers. 


I made sure to measure out the amount of chiffon I had to ensure the pattern I picked would use what I had and not need much more. Some patterns I looked at needed about 5 yards! I only had about 2.  

Dyeing: 
Of course my dress was 100% polyester, which is such a "no-no" for dyeing.  I tried reading as much as I could about how to attempt to do this with RIT dye (since I didn't feel like waiting for the polyester dye to ship and come in) and since I'm really bad of following instructions! 


Well, everything says NOT to do this...hmm... Yup I'm going to try it! Now I don't recommend this unless this is an item a) you don't care about (which I love my dress, but I know I'll never wear it again) and b) you'll never wear it the way it is.  The smart thing to do is buy the dye meant for your fabric type, but here is how I went about dyeing my dress the WRONG way).  


I gathered all of my supplies: 
- Liquid RIT dye in Aquamarine
- Rubber gloves
- Stockpot
- 1 cup vinegar
- glass bowl to put dyed clothes/fabric in to transfer to sink
- 1 tbsp. laundry detergent
- Something to stir your brew with (I used a paint stick)


1. I boiled the water first then added in the whole bottle of dye (doubled the intensity for the 1 gallon water because I knew it wasn't going to dye as easily). 

2.  Say a little prayer/rain dance or whatever will help you to make this work and put in your fabric (ahhh!!!!).   

3.  Set the time for 5 minutes and stir away. It's a great way to get an arm workout! 

4.  When the timer goes off, pour in the vinegar and laundry detergent.  

5. Set the time for at least 25 more minutes and stir constantly.  I left the stove on so the water continued to stay hot while I was dyeing the fabric.  When I would pull up the fabric it didn't appear like it worked. I was disappointed, but figured I could just try with poly dye...

6.  When you feel that you have reached the dye intensity you want, transfer clothes to the sink and rinse first with warm water, then with cold water.  

7.  When the water runs clear, wash your clothes in the washing machine (yes I still did this even though everyone said the dye will just wash out!)

8. Hang to dry and here is what I got! 

In the picture it looks a lot lighter, but it is a sky blue color. It's not the color I was looking for but I'm hoping that when I get the lining for the dress, I can alter the color a little bit.  If not, I'll try dyeing it again.  

Some things I would have done differently: 
- I would have added in more dye (probably a green color to make it more teal)
- I would have dyed it for longer. Who knows if it would have gotten any darker, but I did the bare minimum because I really thought it wasn't working. 


Like I said, I don't recommend you doing this on any item, make sure it's something you don't care about or try to test it on similar material. Polyester is really finicky.  The threading in a tank top I threw in the pot didn't dye at all, but the cotton tank top did, so it really depends on the material.  


Now to turn this fabric into this!!

Let me know if you have any questions!! I can't wait to share my final product with you! 

Thursday, August 28, 2014

Bathroom Finale!

Since we were replacing the vanity, we needed to put in a new floor since the flooring wasn't under the vanity.  I went back and forth of what I wanted since we had linoleum before. It wasn't that I didn't like our flooring before, but since I had to change it, I didn't know if I can find something I liked more.

I didn't like any of the linoleum they had at the store and since I was renovating the bathroom by myself, there was no way I was able to cut and put in tile, nor do I have the right tools.

Another choice I had was the self-adhesive vinyl squares.  I HATE them, but the ones that I did like (12"x24" tiles) were (of course!) not available in stores and I didn't have time to order online.  So while searching for vinyl tile squares that I "sort of" liked (30 minutes of walking in the SAME aisle was torture!), I realized I can grout tile!!! Yay!! I really wanted to do a happy dance in the store but I didn't think it was appropriate haha.  So I found tile that was a lighter color since I was painting the walls a dark gray and I got a light gray grout. Now, this is the first time I was tiling and grouting from scratch. So I was anxious!

Before


New tile! 

Adding the grout

Finished product! Don't forget to seal your grout! 


Paint on the walls, new vanity, fixtures up, and Voila!!! 


I'm so pleased with my DIY project! Overall, with curing time for the tub paint and grout, the bathroom took about 10 days.  And I even did things backwards (should have painted the tub last probably since I spray painted the fixtures in the shower...oops!) The only problem I really ran into is the the vanity was taller than my old one, so the faucet didn't reach the bottom pipe of the sink (yup those are REAL plumber terms ;-) so I had to get an extension pipe.  Can you believe I know what I'm able to find things on my own in Home Depot!?!?


Saturday, August 23, 2014

Bathroom Makeover Part 2: Painting the bathroom!!

On to phase 2 of the bathroom! It has been a hectic week where I haven't been able to write but the bathroom is mostly together! I've painted our tub making sure to sand it down a little and repaint..
Before

After!!

So shiny and bright!! Such a big difference! Now hopefully it wont chip! I will keep you posted. 


I also painted all of the fixtures to be a brushed nickel using Rustoleum metallic spray paint with primer in it and then a matte finish over it. 

Before


After

Next is installing the vanity and painting the walls.. Then the bathroom will be complete!! :-)