


One of my favorite things to do is make/decorate cakes. We were heading to a football party so I decided to make a football cake (chocolate cake with peanut butter frosting covered in ganache). Wilton makes a football pan, but I don't have one. So here is a tutorial on how to make a football cake without the pan! Enjoy!
What you will need:
- One rectangle cake - I used a glass Pyrex that was smaller than a 9x13 - maybe a 9x6?? Does that exist??
** You can use a 9 x 13 pan, you will just cut your football template a little smaller so you have extra to piece together the top**
- 2 cupcakes or a smaller cake (if using a smaller pan - you will have extra cake batter, so I made cupcakes)
- frosting (any color for the football and green for the grass)
- chocolate ganache
- white frosting, candy clay, or fondant for laces on football
*I used a homemade cake batter so it definitely makes more than a box of cake, however, you should be good with just one boxed mix. My cake batter made this cake and 12 cupcakes.

1. Once you bake and cool your cakes, you are going to make a football template. I cut the cardboard cake board to the size of my cake, then drew the football. Trim as needed and check it on your cake.


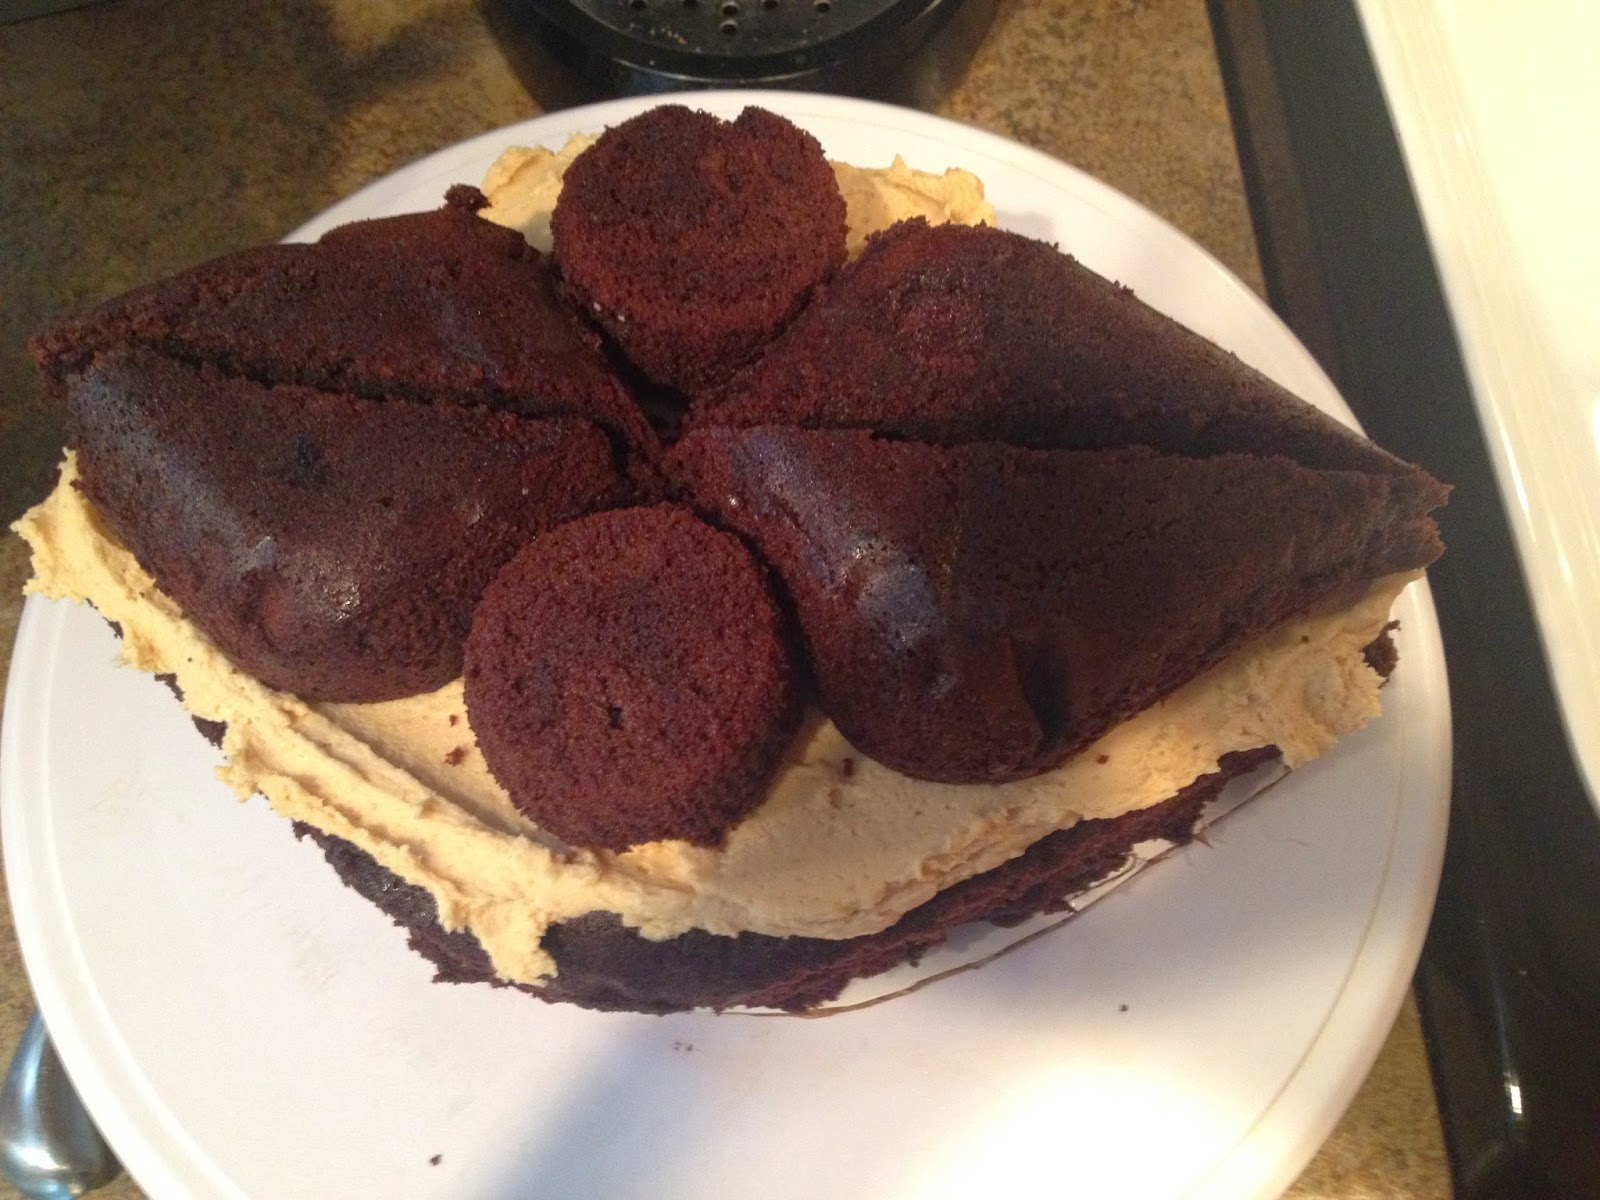
2. Cut your cake out, save the corners because you are going to use them for the top layer!


This is them together (I played around for awhile to get what I thought was the best ratio.) If you are using a 9x13 pan, cut your football template a little smaller than the pan, then you should have enough leftover pieces to put together for your second layer.

3. Add frosting to the top of your bottom later and place your second layer of pieces on top. Now some of you are wondering why I didn't make a second rectangle cake, and this happened for a few reasons. First, I thought my cake would have rose more to have the "rounded" football effect on the top. Second, if I put a second rectangle on top, I know my football would have ended up boxy or uneven. I'm still working on my carving skills, so the rounded pieces of cake helped me to achieve the roundedness (that's a word right??) of my football!
The only thing I really "carved" was making the football shape for the bottom layer and I cut down the corners so they came to a point.
4. Now its time to frost it! Fill in all those extra spaces. Who doesn't love TONS of frosting?!? Especially peanut butter in my case!


Add more frosting and smooth it out.

5. Press the cake with a paper town to smooth out the lights and add texture like a football.


6. Place the cake in the fridge while you make and cool the ganache.
7. When the ganache is cool, but still pourable, take the cake out and place it on a cooling rack. Place the cooling rack on a foil covered cookie sheet or tray. This will make clean up from the ganache nice and easy!
8. Pour ganache over the cake starting in the middle and slowly making bigger circles.


Let the ganache drip off for a little while.
9. Once the ganache stops dripping, transfer your cake onto your serving dish. The ganache will still be VERY gooey.


As you can see, the bottom of my cake isn't perfect.

11. This is where borders come into play. Using green frosting and the grass (Wilton tip# 233) and pipe straight up in short squeezes to make the grass standing up. Voila! You're cake is finished!

Let me know if you have any questions!
No comments:
Post a Comment